Can I Replace Rollers Myself?
An honest DIY guide — what you actually need, what can go wrong, and the situations where calling a professional is simply the smarter call.
The short answer is yes — you can replace sliding door rollers yourself. It's a legitimate DIY repair for homeowners who are comfortable with basic tools, have a helper available, and have already identified the correct replacement part. Done right, it takes about two hours and costs $15 to $50 in parts. Done wrong, it can result in a damaged track, a misaligned door, or a shattered glass panel that turns a $150 repair into a $1,500 problem.
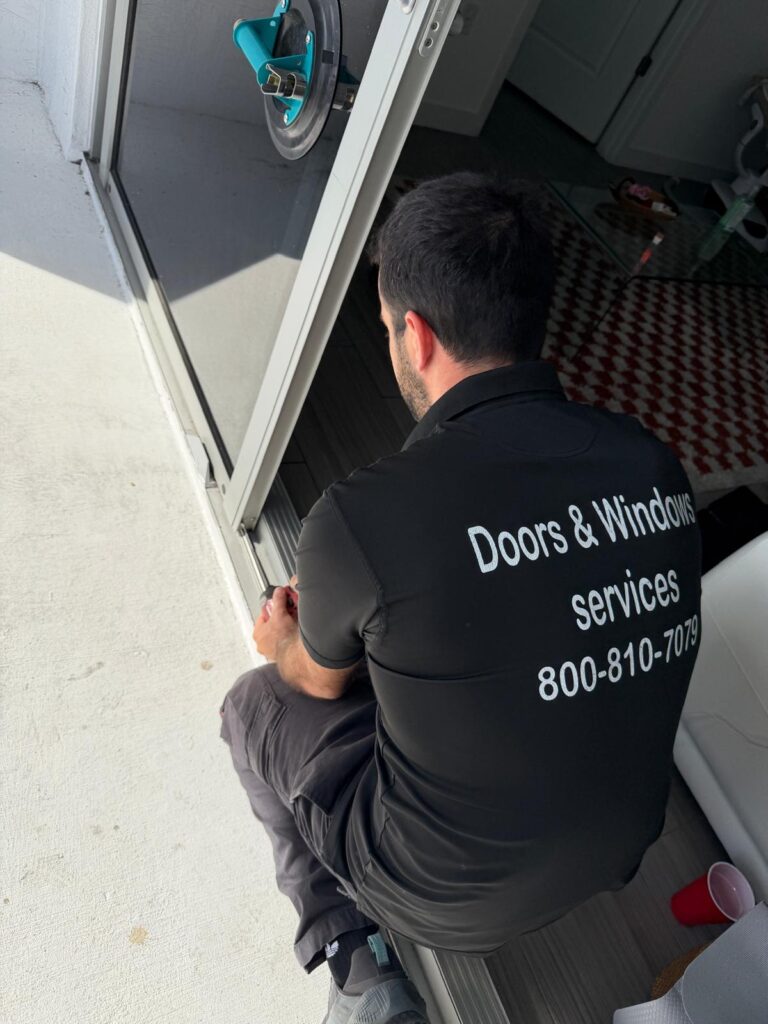
This guide gives you the honest picture — not just the optimistic version. A1 Sliding Doors wants homeowners to be informed about what the job actually involves so they can make the right call for their specific situation. If your door is a standard aluminum-frame patio slider with accessible rollers and you have a capable helper, this is a very manageable project. If your door has impact glass, a damaged track, or you can't confidently identify the correct roller, the smart move is calling a local technician and having it done in an hour with a warranty.

Before and after a roller replacement — achievable DIY on the right door type with the right preparation.
The Honest Answer
Roller replacement is one of the more accessible DIY sliding door repairs because it doesn't require specialized tools or advanced mechanical knowledge. The process is logical and the steps are repeatable. What makes it challenging for first-timers is the combination of panel weight, part identification, and post-installation adjustment — three areas where things go sideways most often.
The majority of homeowners who attempt this repair in good conditions complete it successfully. The ones who run into serious problems almost always fall into one of three categories: they ordered the wrong roller, they attempted the panel removal alone, or they encountered additional damage — a bent track, a cracked housing — that they weren't prepared to handle. Read through this guide completely before starting. The preparation is where the job is won or lost.
Before You Start — The DIY Checklist
Run through this checklist before you buy any parts or pick up a screwdriver. If you can check every box, this is a reasonable DIY project. If any item gives you pause, read the relevant section below carefully before deciding.
- I have identified the correct replacement roller for my exact door brand and model
- I have a capable helper available for the panel removal and reinstallation
- My door does NOT have impact glass (or I have confirmed my rollers are impact-rated)
- The track is clean and undamaged — no visible bends, gouges, or corrosion
- The door frame is straight — no visible warping or damage at the corners
- The door has only one problem (rollers) — not multiple issues at once
- I have 2 to 3 hours available and am not rushing the job
If you haven't identified the correct roller yet, start there before anything else. Our guide on sliding door roller identification and replacement covers how to find the manufacturer stamp, measure the housing, and match the correct part for your door. Getting this wrong is the most common and most costly DIY mistake.
Tools You Actually Need
One of the things that makes roller replacement accessible as a DIY job is that the tool list is short. You almost certainly own everything you need already.
- Phillips head screwdriver — for the roller adjustment screws and retaining screws. A medium-length screwdriver with a comfortable grip is easier to work with than a very short one in tight access holes.
- Flathead screwdriver — to pop off the plastic access caps covering the adjustment holes along the bottom rail.
- Rubber mallet — useful for gently tapping the door panel back into the track during reinstallation. Never use a metal hammer on any part of the door system.
- Vacuum with narrow attachment — to clean the track before reinstalling the door. Debris left in the track after roller replacement accelerates wear on the new rollers immediately.
- Silicone spray lubricant — to treat the clean track before reinstallation.
- A helper — not a tool, but the most important item on this list. Non-negotiable for safe panel handling.
Lay a folded moving blanket or thick towel on the floor before you remove the door panel. When you set the panel down during the roller swap, the padding protects the glass from impact and the aluminum frame from scratching the floor. This is a five-second preparation that prevents a lot of potential damage.
Step-by-Step DIY Roller Replacement
If there's a screen door on the exterior track, remove it first. Lift it up and tilt the bottom out — it's lightweight and comes out easily. Set it safely out of the work area.
Locate the adjustment holes along the bottom rail and remove any plastic caps. Insert your Phillips screwdriver and turn counterclockwise to retract each roller upward into the door body. This lowers the panel toward the track so it can be lifted free. Do both sides.
With your helper positioned on the opposite side of the door, tilt the bottom of the panel toward you while lifting upward. The top of the panel comes free of the upper track first, then the bottom lifts out. Carry the panel horizontally and set it flat on your padded surface. Never lean it against a wall unsecured.
With the panel flat, look into the bottom rail cavity at each end. The roller cartridge is typically held by a single retaining screw or a press-fit tab. Remove the screw or release the tab and pull the cartridge out. Take a photo before removal so you can confirm the new roller matches the orientation.
Slide the new cartridge into the rail cavity in the same orientation as the old one. Secure it with the retaining screw — firm but not overtightened. Repeat on the other end. Before reinstalling the door, clean the track thoroughly and apply silicone spray lubricant.
With your helper, lift the panel and insert the top edge into the upper track channel first. Then swing the bottom in and lower it onto the track. The new rollers should seat in the track groove. Use the rubber mallet to gently tap the bottom rail into position if needed.

New roller cartridge — confirm the housing shape matches the old one before installing.

Roller installed and adjusted — door should glide with minimal effort after correct height setting.
How to Adjust Door Height After Installation
This step matters as much as the roller swap itself. New rollers start at a retracted position and need to be extended to the correct height for the door to operate and lock properly.
Turn the adjustment screw on each side clockwise in equal increments — quarter turns at a time — to raise the door off the track floor. Keep both sides even to maintain a level panel.
Slide the door back and forth. It should move freely with minimal resistance. If it binds at the top frame, the door is too high — lower it slightly. If it scrapes the track, it needs to be raised further.
Close the door and test the latch. It should engage the strike plate cleanly without lifting or forcing the door. If the latch is too high or too low, adjust the door height accordingly until the lock operates naturally.
Look at the gap between the door panel and the frame when closed. It should be uniform from top to bottom. An uneven gap means one side needs a small additional adjustment. Reinstall the plastic adjustment hole caps when done.
What Can Go Wrong — and How Costly It Gets
Being specific about the risks helps homeowners go in with realistic expectations rather than discovering them mid-job.
Wrong Roller Installed
A roller that looks similar but isn't an exact match causes the door to sit at the wrong height, bind against the frame, damage the track, and misalign the lock. In the best case you notice before reinstalling and order the correct part. In the worst case you don't notice until the door is back up and you've caused additional damage. This is by far the most common DIY failure mode.
Panel Dropped During Removal or Reinstallation
A standard patio door panel weighing 100 pounds dropped from even a few inches of height generates significant impact force. Standard glass will likely survive; impact laminated glass is more resilient but can still crack at the edges. Either way, a dropped panel risks frame deformation, floor damage, and serious injury. The cost of repairing or replacing a cracked glass panel starts at several hundred dollars and goes well above $1,000 for impact glass.
Hidden Track or Frame Damage
Removing the door panel sometimes reveals bent track sections, cracked housing channels in the frame, or damaged anti-lift brackets that weren't visible with the door in place. A homeowner prepared only for a roller swap may not have the tools or parts to address these additional issues, which means the door can't go back up until a professional comes out anyway.
If you remove the door panel and discover track damage or frame issues that you weren't expecting, stop and call a professional rather than improvising a fix. Reinstalling a door on a damaged track with new rollers will destroy the new rollers within weeks and potentially cause the door to derail.
Not Feeling Confident? We'll Handle It.
Same-day roller replacement across North Naples, Rural Estates, Naples, Marco Island, Fort Lauderdale, Pompano Beach, and all of South Florida. Flat-rate pricing, no surprises.
The Impact Glass Exception
If your sliding door has impact-resistant laminated glass, DIY roller replacement crosses from manageable to genuinely risky. Impact glass panels are 40 to 60 percent heavier than standard glass — a typical 6-foot impact door panel can weigh 150 to 200 pounds. Two people can handle this weight, but the margin for error during removal and reinstallation is much smaller than with a standard panel.
Beyond weight, impact glass requires impact-rated rollers that meet the Florida Building Code specifications for high-velocity hurricane zones. Standard residential rollers installed under an impact glass panel are a code violation and a safety risk during a storm event. Identifying and sourcing the correct impact-rated roller is a more specialized task than matching standard residential rollers, and getting it wrong has more serious consequences.
For homeowners in North Naples and Rural Estates communities where impact glass installation has been common since the mid-2000s, the vast majority of sliding glass doors fall into this category. In these areas, professional roller replacement is almost always the right call — the risk profile of a DIY attempt on a heavy impact panel simply doesn't justify the parts savings.
When DIY Is Not the Right Call
To summarize the situations where calling a professional is clearly the better decision:
- The door has impact glass. Weight, code compliance, and part sourcing all favor professional service on impact doors.
- You cannot confidently identify the correct roller. A wrong roller causes more damage than it fixes. Don't guess.
- You don't have a helper. There is no safe way to remove a heavy glass panel alone.
- The track shows visible damage. A bent or corroded track needs to be addressed alongside the rollers or the new rollers will fail prematurely.
- The door has multiple problems. If the frame is also bent, the lock is damaged, or the weatherstripping has failed, a professional can assess and address everything in one visit.
- The door is in a condo or HOA property where building management has requirements about who performs door work.
A professional sliding door technician completes a roller replacement in 30 to 60 minutes, brings the correct part, handles the panel safely, adjusts the door to perfect operation, and backs the work with a warranty. For most South Florida homeowners, that combination of speed, safety, and certainty makes professional service the right value — not just for impact glass doors, but for any door where the stakes of getting it wrong are higher than the cost of the repair itself. Ready to skip the uncertainty? Get a free estimate and we'll have it sorted same day.
Let a Pro Handle It Right the First Time
Serving North Naples, Rural Estates, Naples, Marco Island, Fort Lauderdale, Pompano Beach, and all of South Florida. Same-day service, free estimates, warranty on every job.
Frequently Asked Questions
A Phillips screwdriver for the adjustment and retaining screws, a flathead screwdriver to remove plastic access caps, a rubber mallet for reinstallation, and silicone spray for the track. Most homeowners already own everything needed. The bigger challenge is getting the correct replacement roller — not the tools.
The process is not technically complex but requires two people due to panel weight. Standard panels weigh 80 to 150 pounds; impact glass panels can exceed 200 pounds. The main risk is safely supporting the panel's weight during removal and reinstallation — not the technique itself.
Not safely. A sliding glass door panel weighs between 80 and 200 pounds. Attempting panel removal alone risks dropping it, which can shatter the glass and cause serious injury. Always have a second person available before starting.
The most common mistakes are installing the wrong roller and dropping the panel during removal. A wrong roller causes binding, track damage, and lock misalignment. A dropped panel can shatter the glass — particularly costly with impact glass. Getting the part identification right before starting is the single most important step.
Turn the adjustment screws clockwise in equal increments on both sides to raise the door. Check that it slides freely, clears the track, closes flush with the frame, and allows the latch to engage the strike plate cleanly. Make small adjustments and test after each one until the door operates and locks correctly.
Avoid DIY if the door has impact glass, you cannot identify the correct replacement roller with confidence, the track shows signs of damage, you do not have a helper, or the door has multiple problems beyond just the rollers. In these situations a professional completes the job faster, safer, and with a warranty.